Magnum
One of the clubs I launch at is the Rocketry Organization of California (ROC) in Southern California. (The launches are held at Lucerne Dry Lake just south of Barstow.) They have a tradition of holding Magnum drag races and I always wanted to participate. For their November 2000 ROC-stock, I finally decided to build my own Magnum.
It had been a long time since I built a Loc/Precision kit and, of course, I now have strong ideas about how rockets should be built. (Not to mention a strong interest in scratchbuilding.) However, since I wanted my rocket to really be a true Magnum, I started with the Loc/Precision kit. See The Kit section below for what I did to it.
The Pictures
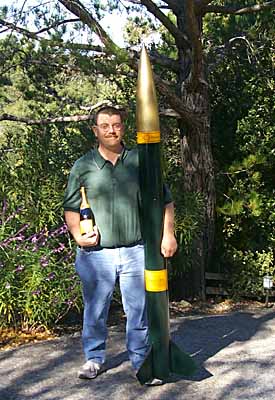
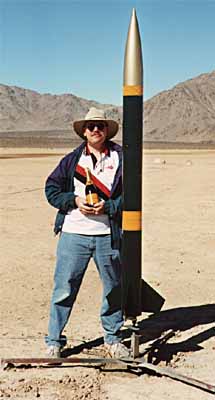
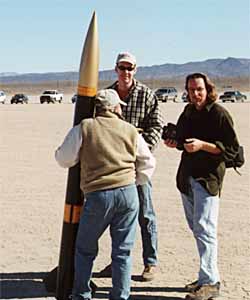
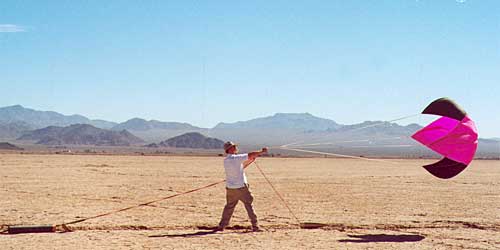
Posing with the Magnum and a bottle of Vueve Clicquot Ponsardin at my house and then out at Lucerne dry lake.
 |
 |
ROC-stock XII
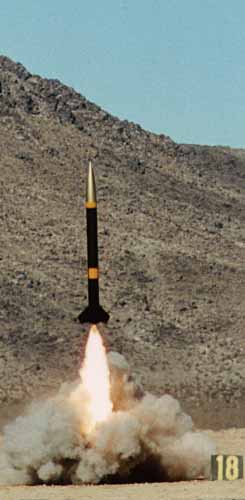
The rocket was built for Rocketry Organization of California (ROC) Magnum drag races and so it flew for the first time at ROC-stock XII on November 12, 2000. Unfortunately, a Magnum drag race didn't materialize at this ROC-stock, but I didn't let that stop me from flying my Magnum and I picked a K1050 to fly it on.
 |
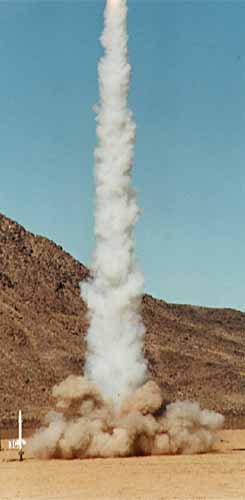 |
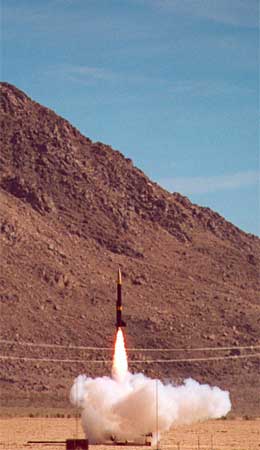
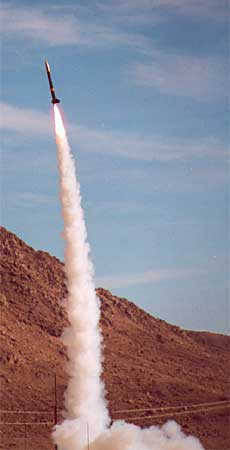
In the pictures above you can see just how hot the K1050 is. This 17lb. rocket went out of sight in just ¼ of a second! (And it went up to 6700'.)
 |
 |
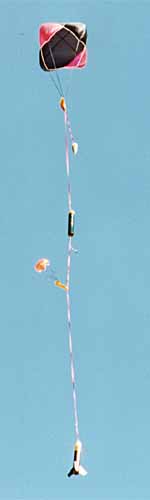
There was almost no wind on Sunday morning when I launched and the Magnum landed right back at the flight line. In fact, it landed in vendor row! The coolest shots I got were the two above, showing the rocket hanging perfectly with both 'chutes deployed and just landing. That's a picture-perfect demonstration of dual deployment! (The Magnum landed on a truck and neither the truck nor the rocket were damaged.)
Turkey Shoot 2000
At Turkey Shoot in November 2000, the second half of the NFPA sparky motor testing was conducted by Bruce Kelly. This resulted in many flights of Kosdon East Skidmark motors with titanium flakes. (The burning titanium produces the sparky effect of the old Silver Streak motors.) I flew my Magnum on a 3" sparky motor.
 |
 |
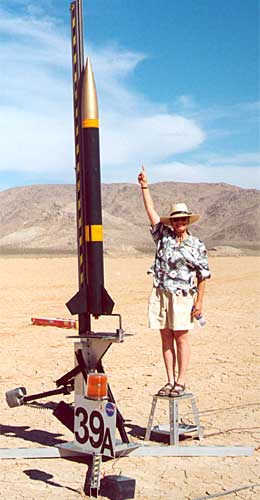
Above left you can see the Magnum prepped and loaded on Saturday morning November 25, 2000. Above right you can see a shot of the aft end with the 3" motor mount installed and the sparky motor taped in place (the Kosdon cases don't work with the Aero-Pack retainers).
 Saturday morning dawned bright and clear, but a little too windy with gusts at 5-15mph
and very cold.
Towards late morning, the wind died down and it warmed up a bit.
At one point it even got warm enough to take of our heavy coats.
Saturday morning dawned bright and clear, but a little too windy with gusts at 5-15mph
and very cold.
Towards late morning, the wind died down and it warmed up a bit.
At one point it even got warm enough to take of our heavy coats.
On the right you can see Sue holding the Magnum with Brent McNeely and his photographer friend. I thought I would be first off the pad, but Ken Finwall just barely beat me to it with his Optimal 160, also flying one of the 3" sparky motors.
Each test launch took a while because Bruce put down pieces of paper as witness plates to detect burning pieces of titanium from the motors and to provide a surface that was easy to set on fire. Here you can see us waiting for our turn to launch and Sue graciously agreeing to hold the rocket.
 |
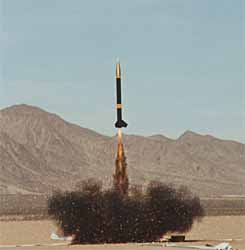 |
The sparky motors were very cool, even during the day. Especially the launches of the largest motors (these 3" ones) got applause. Above you can see a shot just after full ignition and one an eighth second later. Note that the neat pancake shape was due to the use of a flat round blast defector. (We launched my rocket off a Quad-Pod.)
The rocket flew to 4360 feet and was recovered with no damage.
ROC-stock XIII
The Magnum flew twice more at ROC-stock in June 2000. For the first flight, I wanted to try out the AeroTech hybrids and decided to fly a K485 turbo hybrid. (This is a hybrid using white lightning grains instead of paper.) It was windy all weekend and the extra impulse would be good to get this large rocket going quickly.
 |
 |
|
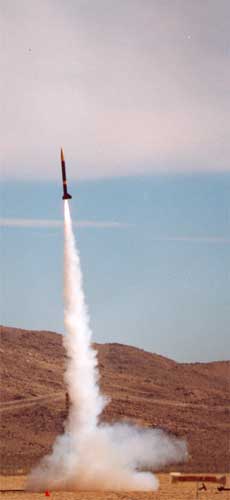
| Sue shows the rocket which way to go. | Magnum flies on the K485. |
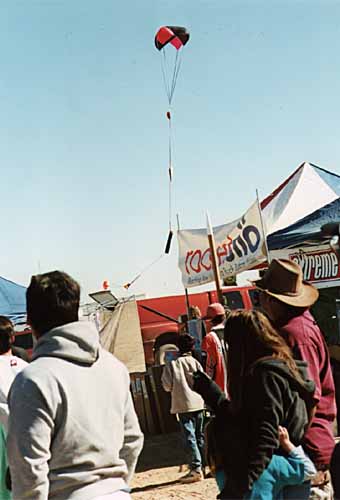
The flight was very nice, despite the wind. You can see the weathercocking in the picture (above, right), but the flight still went perfectly with the dual deployment working properly. For some reason, the wind died down during deployment and the rocket didn't drift far and didn't get dragged along the ground. The G-Wiz said 5656 feet at apogee.
Unfortunately, the second flight on Sunday wasn't so lucky. At 8:00am on Sunday the wind seemed to be gone, but by the time I was ready to fly at 9:00, it was back with a vengeance!
(I wanted to fly again and I had a K700 that I wanted to use. Originally, I had built the Magnum and K700 for ROC drag races, in particular the traditional Magnum drag race at October 200 ROC-stock. Unfortunately, the drag race didn't materialize last year and on Sunday it was clear that it wasn't going to happen this ROC-stock either.)
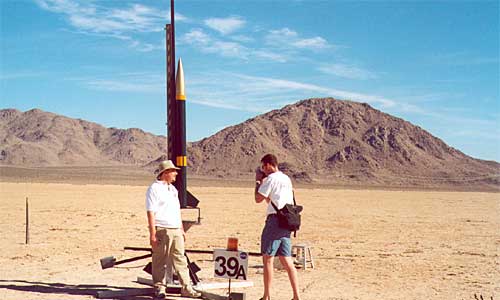
Brent McNeeley interviewed me at ROC-stock for an upcoming Extreme Rocketry
article and above you can see us out at Bill Seider's Pad 39A.
(Photo by Sue McMurray.)
 |
 |
|
| Initial liftoff looks great. | Weathercocking right from the start. |
The flight appeared normal, other than the obvious weathercocking. (G-Wiz reported 7996 feet.) The landing was much tougher as the wind picked up the parachute and dragged the rocket hundreds of feet over the playa.
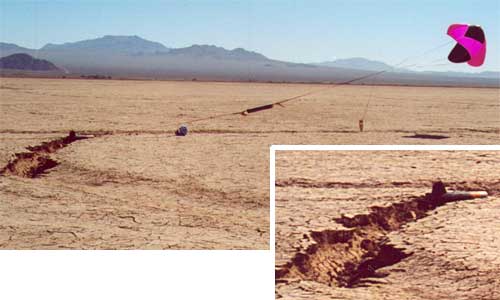
In the photo above you can see how much the wind was pulling the parachute when we reached the rocket. The only reason the rocket stopped was the that the booster got stuck in one of the many gullies as you can see in the insert to the right.
You can see how much it was pulling as I grabbed the bridle to disconnect the 'chute above. (Photo by Sue McMurray.) The Rocketman R12C is fully inflated and pulling with a lot of force! This rough treatment scratched up the rocket pretty badly and even made a dent in the recovery airframe section which will require a fiberglass repair.
The Kit
The Magnum kit is one of Loc/Precision's larger kits with 5.5" diameter tubes and an overall length of 83½". Despite the size, the Magnum is very much a model rocket-style kit. The tubes are paper phenolic and it's basically just a big tube with a motor mount in one end.
I decided to modify the organization, but maintain the same overall dimensions. Mainly, I wanted to include:
- electronic dual deployment,
- interchangeable motor mounts, and
- a zipper-less design
To achieve these goals, I decided to cut 11" from the 45" long booster airframe section and add it to the 17" long payload airframe section, making a 28" long booster section. The 34" remainder of the booster airframe tube would make the recovery section. The 28" booster section plus the 4+" space inside the zipper-less coupler leaves room for a 32" motor, which will even accommodate an M1315.
The diagram above compares the original Magnum design with the modified Magnum I actually built. Of course, I also made other changes like fiberglassing the airframe tubes and reinforcing the coupler. The Loc/Precision airframe tubes are quite stiff, even though they're paper, and with a single wrap of 4oz. fiberglass they now have a strong skin as well.
 The couplers are another story.
They are softer than the airframe tubes and much thinner.
Ed Hackett had his Magnum coupler buckle in flight and I can see why!
I reinforced the inside of the coupler used for the anti-zipper section with
5.7oz. carbon fiber and 4oz. fiberglass on the inside.
Also, because of the way the interchangeable motor mounts work, there is a centering
ring in the center of the coupler tube.
It won't buckle now!
The couplers are another story.
They are softer than the airframe tubes and much thinner.
Ed Hackett had his Magnum coupler buckle in flight and I can see why!
I reinforced the inside of the coupler used for the anti-zipper section with
5.7oz. carbon fiber and 4oz. fiberglass on the inside.
Also, because of the way the interchangeable motor mounts work, there is a centering
ring in the center of the coupler tube.
It won't buckle now!
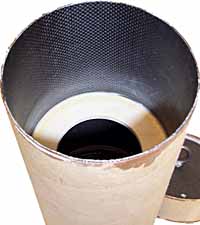
To the right you can see the inside of the coupler, including the forward centering ring into which the removable motor mount units slip. Carbon fiber is always pretty!
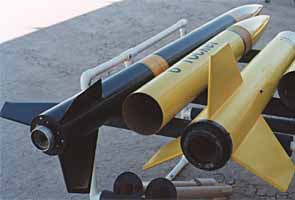
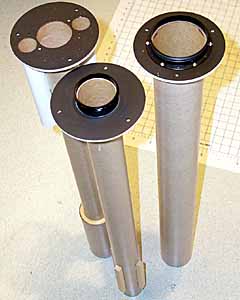
For the drag race, I will fly it with a single 54mm motor. (The October 2000 ROC-stock magnum drag race is planned to fly K700s.) The stock Magnum has an interesting feature: two 29mm tubes alongside the 54mm central motor tube. This made me think that it would be neat to have interchangeable motor mounts to handle different combinations of motors in the same rocket. I decided to build the rocket so that it could accommodate up to a single 3" tube or combinations of tubes with a total diameter of 5" or so at the aft end. Below you can see the aft end of the booster section interior and the three motor mount units.
 |
 |
This means that the fins are through-the-wall, but are not bonded to the motor mount.
 They extend ¾" into the airframe and are reinforced inside with fillets and
9oz. fiberglass tape.
On the outside they are reinforced with fillets and 4oz. fiberglass running tip-to-tip.
They extend ¾" into the airframe and are reinforced inside with fillets and
9oz. fiberglass tape.
On the outside they are reinforced with fillets and 4oz. fiberglass running tip-to-tip.
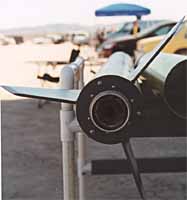
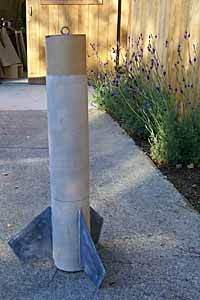
On the right you can see the completed booster in side view. Note the anti-zipper design with the coupler sticking up from the booster. The motor mount tube goes right up to the top of the coupler and is just barely long enough to accommodate an M1315!
Also note the joint where the two sections of airframe have been joined. This is the last time this joint will be visible since it is covered inside with a coupler section, outside with fiberglass and will soon be covered with paint.
The airframe has been sanded, fabric weave pinholes filled and sanded down again with 100 grit. It's on its way into the shop for the first coat of printer.
 The nose cone is a plastic one, with a molded-in aft end and attachment for the recovery system.
Needless to say, this wastes space that could be used for nose weight or a Walston tracker.
(Not to mention extra space for the main parachute.)
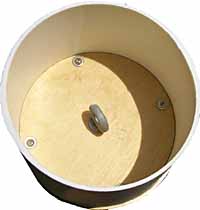
I cut off the aft end of the shoulder and epoxied a ring forward of the shoulder just inside
the base of the nose cone.
A bulkhead with an eyebolt screws into T-nuts in the ring, providing access to the body of
the nose cone to add removable weight and to install the tracker.
On the right you can see the inside of my nose cone with the plate screwed in place.
The nose cone is a plastic one, with a molded-in aft end and attachment for the recovery system.
Needless to say, this wastes space that could be used for nose weight or a Walston tracker.
(Not to mention extra space for the main parachute.)
I cut off the aft end of the shoulder and epoxied a ring forward of the shoulder just inside
the base of the nose cone.
A bulkhead with an eyebolt screws into T-nuts in the ring, providing access to the body of
the nose cone to add removable weight and to install the tracker.
On the right you can see the inside of my nose cone with the plate screwed in place.
 The stock magnum doesn't have any provision for dual deployment or even recovery using
electronics.
That will never do so I implemented the standard double break dual deployment with the
drogue coming out above the booster and the main coming out at the nose cone.
The stock magnum doesn't have any provision for dual deployment or even recovery using
electronics.
That will never do so I implemented the standard double break dual deployment with the
drogue coming out above the booster and the main coming out at the nose cone.
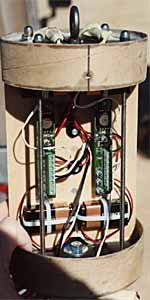
There are two switches on the board which turn the units on. This incarnation requires you to switch on the units before sliding the bay into the recovery airframe. Ideally, the switches would be routed to the airframe so they could be armed only once the bay is installed and the rocket is ready to launch. However, routing switches this way when the bay is completely removable is a trick.
I tried a new technique with this rocket. Rather than mounting the electronics bay permanently in the airframe and having a removable bulkhead at one end, I made the bay self-contained and entirely removable. On the right you can see the bay prepped with the two G-Wiz LC Deluxe units and four batteries. Note that the bundles on the top are the 2g main deployment charges. Two 1.5g charges at the bottom are for the drogue.
What does "Magnum" suggest to you? To me, it suggested that I paint the rocket to look like a revolver. However, Sue suggested a champagne bottle and I liked that idea better. So, we have a magnum of champagne!
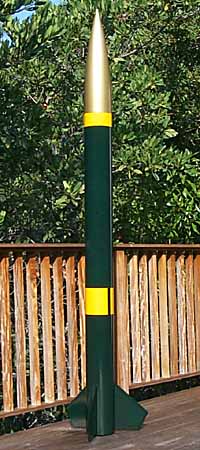
I decided to follow the color scheme of the Vueve Clicquot Ponsardin bottles and picked out PPG colors which matched the bottle, paper labels and foil as closely as possible. The bottle color was hard to match because a lot of the color comes from the transparency of the bottle. The nose cone is gold to represent the foil top.

Of course, the rocket doesn't look too convincing with just the colors. (It just looks like a green rocket with yellow-orange stripes and a gold nose.) So, it needs labels to complete the picture.
Below, you can see the text of the neck and body labels that I made for the Magnum.
 Under "CHAMPAGNE" it says "Appelation Incontrôlé peu approprié" which means
"uncontrolled inappropriate appellation."
(The original bottle said "original controlled appellation" in French and
any chance to poke fun at snobbery is worth taking.)
Under "CHAMPAGNE" it says "Appelation Incontrôlé peu approprié" which means
"uncontrolled inappropriate appellation."
(The original bottle said "original controlled appellation" in French and
any chance to poke fun at snobbery is worth taking.)
The labels give it the touch necessary to identify my Magnum as a champagne bottle and, just to make sure, it even says "champagne."