Big Kahuna
The Rocketman Enterprises Big Kahuna kit was the "over the top" rocket I just had to build. (There is actually a long story behind this.)
This kit marks my entry into "level 3" territory although I have not done the documentation for Tripoli level 3 certification. Rockets this size are really too impractical for me. This rocket requires a huge amount of storage space and was difficult to build and paint. 38mm and 54mm high-power rockets are much easier and more fun. Even with that said, this rocket is awesome in person!
We wanted to launch on June 26, 1998 to celebrate the 2 year anniversary of our company (Siebel Systems, Inc.) going public. However, I don't want to try to arrange the land use permits and FAA waivers necessary for this so I tried to launch at the annual Balls launch at Black Rock, Nevada on August 1, 1998. Due to various failures and ultimately an insufficient launcher, we failed. But, we took lots of pictures and ended up with a great story! Finally, at Balls 009, the Big Kahuna actually flew.
The Pictures
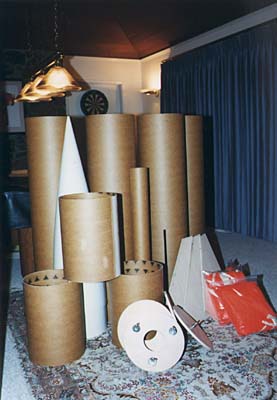
Even the boxes the Big Kahuna comes in are impressive:
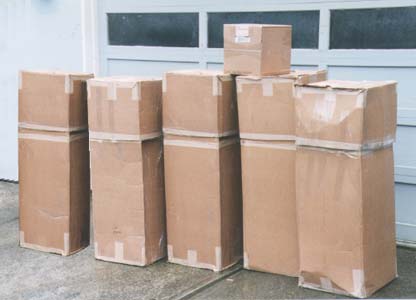
You get a 4ft nose cone, four 4ft body tube sections and three plywood fins plus the expected motor mount tube, centering rings, couplers, bulkhead, three parachutes and hardware. But, no instructions.
Here you can see me standing in my front yard next to the Big Kahuna. Yes, that rocket is 19 1/2' tall and no, I'm not a dwarf! In the first photo I'm obviously happy to be done with the painting. In the second you can see the color scheme and decal work more closely (see the inspiration: our product's splash screen) as well as the three major pieces for transporting and the full "M" motor casing. The decals were printed on Detail Master decal film with an Alps MD-1000 printer.
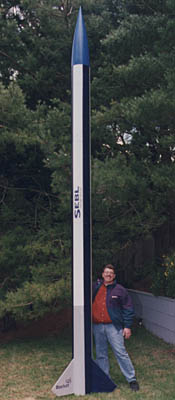 The Big Kahuna standing in all its 19 1/2 foot glory.
I'm obviously happy to have the painting finally done.
The Big Kahuna standing in all its 19 1/2 foot glory.
I'm obviously happy to have the painting finally done.
|
 You can see the color scheme and decal work more closely in this picture
as well as the three major pieces for transporting (and a full "M" motor casing).
You can see the color scheme and decal work more closely in this picture
as well as the three major pieces for transporting (and a full "M" motor casing).
|
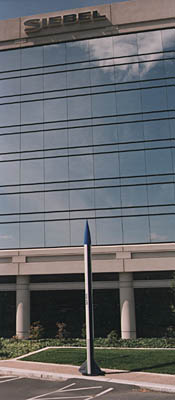 Here's the Big Kahuna in front of our main offices in San Mateo.
(photo Prasanna Amerasinghe) |
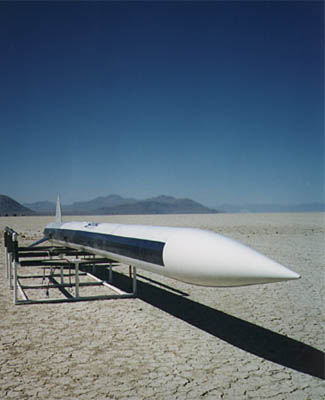 The Big Kahuna pointing across the desert in Black Rock, Nevada.
It almost flew here, but not quite.
See the launch report.
The Big Kahuna pointing across the desert in Black Rock, Nevada.
It almost flew here, but not quite.
See the launch report.
(photo Sabina Strobel) |
The Story
The company I work for (Siebel Systems, Inc.) has been doing fantastically well. Everyone at the company (300+ people at the end of 1997) got a $10,000 bonus at the beginning of 1998.
One of my fellow workers, Tom, suggested we find a fun and creative way to spend the bonus money, or at least a substantial fraction of it. Some of us agreed that this was a noble goal. Tom started us off in grand style, by buying a "life size" statue of E.T. from The Sharper Image (search for "e.t." in the catalog). This is about as impractical as you could get. Andy, another coworker bought a replica suit of armor, which is almost as impractical.
This left me with quite a challenge. I had just gotten into rocketry again and had built four rockets (Quest, Estes, AeroTech, and Loc/Precision) and had found the Big Kahuna kit by Rocketman Enterprises. There were also a story with pictures of an actual launch Rocketman did for Joe Boxer, the underwear company. Needless to say, I'd found my impractical purchase (and cheaper than E.T.)! Impractical because it uses an "M" motor and I didn't even have my level 1 certification at the time (now I am certified level 3).
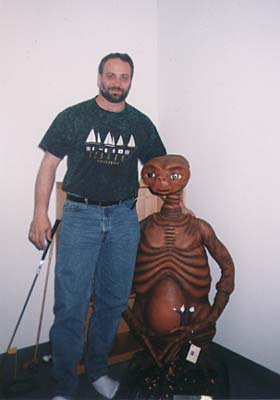 Tom at work (in case you were fooled by E.T. and the golfing equipment).
|
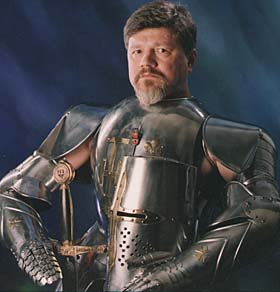 Andy's ready for a quest in his suit of armor.
|
This project is not sponsored by Siebel Systems, Inc. and all work on it is on my own initiative and not work related.
The Kit
OK, here's a new one for me: this kit came with no instructions at all. When I talked to Ky Michaelson of Rocketman, he told me: "It goes together like any other high power kit." OK, so I built the Praying Mantis to see how his rockets go together. Luckily, I got help from Dennis Kieselhorst and Ky Michaelson.
You can see from the picture below that the kit is pretty impressive before you even start putting it together. Those body tubes are 4 feet long each!
 |
|
Of course, a kit this size has lots of body tube seams to full. I calculate that I had 288 feet of seam to fill (11.5" O.D., 16 feet of tube, 2 inches between seams). The finished rocket is heavy. The large PML tubes and heavy wood fins add up, not to mention the fiberglassing of the fins to the motor mount tube.
| aft section | 29.70 |
|---|---|
| recovery section | 23.85 |
| payload section | 16.30 |
| total | 69.86 |
The C.P. is 189" and the C.G., with the Rocket Dyne O3500 loaded, is 166" so the rocket has almost two calibers of stability just due to its extreme length.
Since there were no instructions, there were several possible configurations. I had four 4' body tubes and a nose cone. I could have made the rocket split in two for dual deployment, which I was too new to realize at the time. I chose to have the base of the rocket (motor mount and fins) and the next section permanently epoxied together for strength. I still had the choice of having the nose pop off by itself or with one or two body tube sections. I decided to use the center body tube section to contain the three parachutes and have the nose and top body tube section come land with a single parachute and the bottom three sections land with a pair of 'chutes. This way, there would be a whole section for payload. which came down with the nose and was protected from the ejection system.
To pressurize a single tube section to 15lb/in2, I would have needed to use more than 38 grams of black powder! Dennis Kieselhorst suggested I mount a 6" tube inside the section and just pressurize that, which I decided to do. Even that took 10+ grams of powder.
I wanted to test that the system would work, so, I started with 5 grams of powder (each gram is about 1cc) and popped it off in my front yard. The first try with 5g only separated the sections about 2" of a 9" tube coupler overlap. OK, well I guess the calculator was right. The second try with 10g separated the sections about 10 feet.
| Here's the ejection charge in a holder I made from a piece of aluminum tubing and an electrical box cover. The tubing was epoxied to the cover and then the cover was screwed into the center hole with the tube sticking into the parachute tube. | 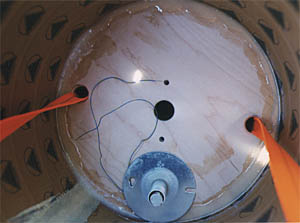 |
||
| Here's the ejection test setup. The recovery system section has the ejection charge in the bottom and I'm testing it separating from the upper (payload) section. You can also see the 1" tubular nylon I'm using for the parachutes. This actually runs all the way from the motor mount, through the center recovery section and attaches to the parachutes at the top of the section. | 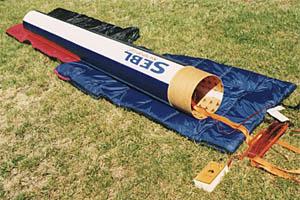 |
||
| Here are the pieces ready to go. I put each half in a sleeping bag to keep them from getting grass stains. It didn't matter for the first test (5g), but the sections shot apart about 10ft in the second test (10g). | 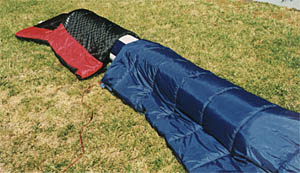 |
||
| Here you can see that the charge broke my holder assembly without separating the rocket! I am having another holder made professionally by welding the pieces. |  |
These tests were done with Pyrodex "P", not black powder and as far as I can tell, there were no problems with it. (I can't purchase black powder anywhere in this area.)
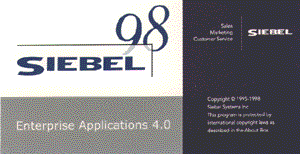 |
I was also trying to match the style and colors of the new version of our product, Siebel98.
So, I tried using Krylon Living Color paints instead of the standard Krylon automotive paints.
These are much more difficult to use: thinner and less consistent.
Anyway, I did finally get it painted and the decals applied.
You get the idea from our splash screen (left). |
 |
|
| "SEBL" is our company's NASDAQ stock symbol and "Siebel 98" is the name of our most recent product release. | |